Wednesday, July 29, 2009

Apfelkuchen


I have a little confession to make about today's post: I'm letting you into the gloriously tempting world of divine German pastries, complete with drool provocation via my digital cam, and I'm not even offering you a recipe.

Dear readers, I am sorry.

Honestly, for my non-Germany-based readers, you really should be kicking yourselves for not being in The Land of Many Bakeries. If you could only see the endlessly delicious street corners, the bakeries filled with treats of all shapes, creams and custards and glazed fruits and chocolate. Oh, the chocolate. The best thing about it all is that everyone here loves sweets. We all know how positively annoying it is to be in a place where you feel like the lone non-dieter, the only person who really, really must have a treat at least once a day. When you feel like the Santa Claus on Christmas Eve compared to the stick-thin rabbits surrounding you? Well, you will never, ever feel that way in Germany. Bring on the butter and sugar, folks, we're having a party! Or maybe not a party, we just need a little mid-morning pick-me-up. That's the spirit.


I've tried to be responsible to my stomach, but thus far, I've tasted Mohnschnecke, Apfelkuchen, Macarons (yes, I know that they are French), hazelnut ice cream, raspberry ice cream, butter cookies, almond croissants, Ritter Sport chocolate, cappuccino-flavored chocolate, waffle cookies, rhubarb squares - what, not stomach-conscious you say? What about the Sephardic orange cake? That's healthy, right?

I'm dying to make a few of these recipes. Unfortunately, as I've mentioned a few (too many) times, I'm a bit short on baking hours so you can expect plenty of experimentation mid-September. For now let's begin with a few words on this pictured Apfelkuchen. What you see here is the most typical German apple cake. It's baked in a sheet and cut into large rectangles. The bottom layer is a light yellow cake - thicker than pound but heavier than angel food. Second, there's a creamy layer, topped with thinly sliced peeled apples. Last, you've got crumbly streusel to round out the cake's textural variation. When I first purchased this cake, I had the option of buying it with a glazed top in place of the streusel, but my hitherto unacknowledged streusel affinity won out, and I succumbed to buttery bliss.

My second thought, after the streusel vs. glaze debate, was that the cake layer was too thick compared to the custard-cream layer. I might have thought differently had the cake been of the thicker pound variety, but this cake looked like it only functioned as a serving platter for the cream. Bite number one, however, proved to me that I judged too soon. The cream is shockingly sweet - thick and milky, and in fact, it needs to be cut by the light texture of the cake. The streusel gives the whole cake a necessary crunch, making each bite a play of moist and dry, slippery and chewable, buttery and fruity.


I offer two primary suggestions for this pastry. Most importantly, the thickness of both apples and streusel layers should be increased, as both were slightly overwhelmed by the cream. Next, the butter content in the streusel should also be upped. When I test an apfelkuchen recipe in September, I'll make sure to create a cake with slightly better ratios. On the other hand, I'm sure that the apple cake recipes vary from bakery to bakery here.

Besides this complaint, all I can really say is that oh my, do Germans know their pastries.


Oh, and to those of you who are celebrating Tish'a b'Av, hurry and buy your cake before the fast begins!

Sunday, July 26, 2009

Guest Post - Ooey, Gooey Bars


I know I just posted a recipe called "Ooey, Gooey Brownies," but I'll admit to a little recipe name pilfering. Truth be told, I stole the name for those brownies from this dessert. These are the original Ooey, Gooey cake squares. By now all of you readers know that I am in Berlin, Germany, where I find myself swept up in all sorts of activities (not the least of which is eating a lot of tasty treats). As such, my family is helping me keep up the blog during my stay here. Today I introduce you to Chelsea, my lovely sister - who has a blog of her own, which you should all check out - the writer for The MuffinTin Post's very first guest blog! Chelsea presents one of her favorite desserts, an easy one to whip up for last-minute guests.

From here on out, Chelsea's takin' the reins.


"I love not only making but also eating Ooey Gooey Bars! These are a great dessert for any occasion and definitely a huge hit when I take them places! These are GREAT with a glass of milk and even with fruit like strawberries or blueberries on top! I you love them as much as I do.

Here is what to do:

1 package yellow cake mix
1/4 cup butter
1 egg

Preheat your oven to 350 degrees. Grease and flour a 9x13 in. cake pan. Mix together melted butter, cake mix, and egg. Spread into the pan.

1 lb. powdered sugar
2 eggs
8 oz. cream cheese

Beat sugar, eggs, and cream cheese together. Spread the mixture over the cake mix, creating two layers.


Bake for 30-40 minutes. You don't want to bake the bars until the are totally dried out. Bake the top layer just enough that it becomes glazed. You'll want the top layer to be ooey and gooey. Let the bars cool for about 15 minutes before cutting them to serve.


Try not to eat the whole pan yourself . . .

Wednesday, July 22, 2009

Quinoa with Fruit


I think I'm overworking myself a bit. I spend three hours per day in class, plus several hours of planned appointments/excursions/tours after that. I study Hebrew every morning for at least an hour. I try to run as often as possible. I've started impromptu German lessons two to three times per week, unfortunately held from 9pm to 12am. Then there's reading and writing for class each day. And on top of all of that, I'm supposed to get out and see Berlin as much as possible!

Doing all of these activities leaves me with little sleep each night, and for better or for worse, coffee just doesn't cut it in the morning. I need something energizing and nutritious to get me through the day. I've never been able to skip breakfast - I eat it even in the most dire of circumstances - but now my breakfast standards have been boosted up a notch. I need whole grains and protein! However, being in Berlin, my breakfasts are also a food experiment. I've tried different kinds of yogurt, berries, muesli, and juice, and I've found that even far away from my standard products, breakfast here is still my favorite meal of the day. There is one breakfast, though, that I can't get here. Hailing from the Andean region of South America, quinoa, the US food industry's latest and greatest new import item, is a unique and deliciously simply grain.

The word quinoa comes from the Peruvian indigenous language Quechua, and in eating the tiny granules, you are actually consuming small seeds of the quinoa bush. Quinoa is similar to couscous, but it had a thin fibrous strand surrounding the kernel. Nutritionally, quinoa beats most of its competitors. It has about 12% protein, but not only that, it in fact provides a complete protein since it contains all 9 essential amino acids. It is a good source of fiber, magnesium, and iron, and it is gluten-free. As an added bonus, it's also kosher for Passover because it wasn't know about when these dietary restrictions were made!


Quinoa can be eaten all sorts of ways: as an accompanying dish with vegetables and some olive oil, in soup, as a pepper or tomato stuffing, or alone. However, as I said earlier, I've been searching for hearty breakfasts, and quinoa fits the bill. Here's an experimental quinoa breakfast I tried. It's the simplest of recipes, but it will keep you going until noon!


Quinoa with Fruit

Ingredients

1 part quinoa
2 parts water
hefty pinch of salt
1 1/2 tsp. of sugar per cup of quinoa
handful of dried fruit, chopped

Method

Rinse the quinoa using a fine sieve. This is important because many brands of quinoa currently imported are not thoroughly washed. Then bring the water to boil in a saucepan. Once the water is boiling, add the quinoa, and boil for 2 minutes. Then reduce the water to a simmer, and add the salt and sugar, stirring well. Cook the quinoa until almost soft. This should take about 12 minutes. In the remaining few minutes, add the dried fruit. Then finish cooking. When the quinoa is finished, the strand surrounding the kernel will have detached from the seed itself. The quinoa will also have expanded, similarly to couscous. I like my quinoa with a slight bit of crunch so I generally undercook it by a few minutes. Drain off excess water, and serve the dish immediately.

Saturday, July 18, 2009

A Proper German Meal


Today I bring you the first proper German meal I have prepared in Berlin. As I mentioned in my last post, I've been a little starved for a real dinner since I've been here. Today, my first free day since the beginning of my study program, I decided to rectify the situation with a little trip to the store. Actually, I went to four stores. First, I went to Bio Company to buy a special tofu product. (More about that later). Then I went to Kaiser's, where I bought non-produce items like yogurt, bread, and crushed tomatoes. Afterward, I stopped at a produce stand for fruits and vegetables, and finally I headed to a Turkish shop that sells nuts and dried fruit. 


[An aside: I must add that I have at long last found a local store that sells dried carob! I've been looking for a year now! I consider this no small accomplishment since I generally go out of my way to find and purchase dried fruit.]

After my tour of German food vending establishments, I returned home to my small apartment in Kreuzberg, went for a run on Karl Marx Boulevard, and then fired up my stove to prepare a German Abendessen.


The Menu

Tofu bratwurst with onions
Purple cabbage sauerkraut
Green salad with quark dressing
Rye bread

The salad dressing is a typical German sauce, but I was experimenting so the recipe is still in the works. I'll have it to you shortly. First, let's take a look at tofu-wurst preparation.

Ingredients

Tofu bratwurst or the real thang of course
Water
1/2 tbsp. of oil (enough to very lightly coat a pan)
Onions, make as much as you want
Salt to taste


Method

If the tofu bratwurst has a casing, prick it several times with a fork before you begin cooking. Places the bratwurst in a skillet, and add enough water to the skillet so that the water comes up halfway on the side of the tofu. Bring the water to a light simmer, and cover the skillet. Depending on the size of the tofu, you will need to simmer it for some time. I had small bratwursts, and I cooked mine for about 20 minutes. Standard size should take about 30 minutes. The tofu will absorb some of the water and expand in size. Do not boil - only simmer - the water throughout this period. After the tofu has expanded, drain the water from the pan, and turn up the heat to med-high. Add just enough oil to the pan to coat the bottom. (I used just a few drops of oil). Pan-fry the bratwurst by letting it brown on one side and then rolling it to the other side. I rolled the bratwurst around in the pan so that all sides would be crispy. About halfway through this process, add the onions, along with the salt. Pan-frying will take 5 to 10 minutes. After the tofu is nicely browned, remove it and the onions from the skillet. Serve while still warm.


Since in Germany, I haven't yet had time to make homemade sauerkraut - which I prefer - so after I finished my tofu-wurst, I opened a big bottle of red cabbage sauerkraut that I bought a few days ago. No, that's a lie. I re-opened the bottle. I have, in fact, been eating this stuff for every meal since I bought the bottle. I've actually even been spooning it out of the jar for a little snack mid-day. It's that good. However, although I've been eating it cold, directly from the fridge, I wanted to warm it up for this dinner. I warmed it in the same pan in which I cooked the tofu. 


To serve the whole meal, I nestled my tofu-wurst into two mounds of onions and kraut. Then I broke of a piece of hearty German rye bread, and I made up a huge green salad with that soon-to-be-published quark dressing. 


Tuesday, July 14, 2009

Mango and Summer Vegetable Salad


Since I've arrived in Berlin, I've had exactly zero hours to cook. Sure, I made a quick egg and tomato sandwich this morning and a feta salad last night, but it's nothing worth the blog. (It would be a little insulting to your intelligence to write an egg sandwich recipe here, no?) So I'll be filling in with a few recipes from home and some Berlin food recipes until I have more time (when?) to cook. 

Traveling on a tight budget and eating in restaurants for a few days on end can put ya in the mood for veggies, and I have certainly been in the mood for veggies. Yesterday I made my second or third trip to the Berlin grocery store to purchase 3 bell peppers (just over 1 Euro for all three!), scallions, tomatoes, beets (essential I tell you), etc. I've been craving and craving and craving more vegetables to make up for their lacking in my diet. I had salads for lunch and dinner yesterday. Vegetable soup for dinner tonight. The aforementioned cucumber, tomato, egg sandwich for lunch today. So tonight I bring you a salad a made about a month ago back in a Texas kitchen. Enjoy with these ingredients or put your own spin on it. 


Mango and Summer Vegetable Salad
makes a side salad for 3 or 4

Ingredients 

1 diced mango
2 ears of corn, kernels cut off cob
2 ripe tomatoes, diced
2 yellow squashes, diced
1 bell pepper, diced
as much fresh spinach as you want (I used a large handful)
1 can black beans, drained and thoroughly rinsed or 1 cup dried black beans, cooked, then rinsed and cooled, optional
1 tbsp. Dijon mustard
2 tbsp. red wine vinegar
drizzle olive oil or sunflower oil
salt and pepper to taste

Method

Combine the all veggies and beans except the spinach in a salad bowl. Add more veggies if you prefer. In a small bowl, whip together the mustard, vinegar, oil, salt, and pepper. Pour over the veggies, and allow the salad to sit for about 5 minutes. I almost always let vinaigrettes sit on my salads for a few minutes so that the vegetables absorbs the tangy flavor. Then toss in the spinach and any additional ingredients you might like. (Blueberries, anyone? Sliced grapes? Crumbled bleu cheese or an avocado?) Pull out your summer lemonade, grill up some portobellos, chicken breasts, or bratwurst, depending on your diet, and enjoy summer!

Sunday, July 12, 2009

Ooey, Gooey Brownies


But before we get on with those recipes previewed, let's take a look at the best brownie recipe ever. You've tasted a thick, dry, cakey brownie before, right? The kind that makes you think it should have been a bad cupcake instead? Or maybe you've had the bitter brownie, reminiscent of those packaged brownies with tasteless nut bits from the vending machine? And then there is everyone's favorite: the burnt brownie. The hardened, crispy brownie-gone-wrong. Don't kid yourself, you know you've had a bad brownie.

This brownie can fix all of that. Thanks to the wonderful folks back home, I've been provided with a photo and the typed recipe. This brownie, passed down at some point from a family friend, is of the thin, two-layered sort. The top layer is crispy, but the second it hits your tongue it melts in your mouth. The bottom layer is rich and fudgey, exactly what you want when you're craving chocolate goodness. You MUST make these brownies.

Ooey, Gooey Brownies
recipe from a family friend

Ingredients

2 c. sugar
1/2 c. cocoa
2 sticks partially melted butter
3 eggs
2 tsp. vanilla
1/2 c. flour
1/2 tsp. salt

Method

Preheat your oven to 350 degrees. Lightly grease and flour a 9x13 airbake pan. If you do not have an airbake pan, any pan will work - but airbake is preferable. 

In a medium-sized bowl, mix together the sugar and cocoa. Set aside. In a large bowl or the bowl of an electric mixer, mix together the butter, eggs, and vanilla. Then add the sugar mixture to the egg mixture, and mix on a high speed (or stir quickly by hand) until the mix changes color. The batter will become noticeably lighter. After that, add the flour and salt, and combine well.

Spread the batter into the pan evenly. Bake for 25 minutes. Do not overbake! Remove from the oven, and allow the brownies to cool for about 10 minutes. Then eat!

Thursday, July 9, 2009

A Preview

Dear MuffinTin Post Readers:

I must inform you that I am briefly without internet. I have internet available for short periods during the day, using the hostel's computer, but I do not have access to my photos. Therefore, until internet access becomes available again (by Sunday most likely), I leave you with a preview of some coming recipes and posts.

>A healthy treat from the Andes region of Peru!

>Another review of a German food - but this time something sweet and sugary from the local bäkerei

>A summer salad with some tropical fruit and fresh greens

Look forward to all these posts over the next few days. I'll be back soon!

Tuesday, July 7, 2009

Gooseberries!


As most of you know, I am now in Germany. In fact, I am now in Weimar, Germany, labeled in 1999 the "cultural capital of Europe." Besides doing all sorts of sightseeing, which I can update you on in another forum, I have been checking out the food here. I can't say I have yet had traditional German food, but I have investigated all the produce stands outside of the small food shops. Tasting local, unusual fruit is by far one of my favorite things to do when traveling. 

So today I thought I'd share a new summer berry! The gooseberry - or in German, the stachelbeere,  is, according to California Rare Fruit Growers, native to the Caucus Mountains and North Africa. It requires cool summers and winter freezes, hence its predilection for German farms. The berry bushes can't sustain temperatures beyond 85 degrees; therefore, the fact that I wore a jacket today and ate gooseberries makes sense. There are also several varieties of gooseberries. I sampled the red gooseberry today. You might see the green gooseberry in speciality produce aisles. 

Because I was far from my baking equipment, I tried the gooseberries raw, as a pre-dinner snack. I ate them in Park An Der Ilm here in Weimar, and, while I suspect that - surrounded by the garden houses of famous German writers - they may have been particularly sweet, you will love them just as much if you eat them sitting on your own front porch steps. Here are some pictures and thoughts.


They are about the size of a grape tomato, with translucent skin and light-colored veins. They taste something like a cross between a blueberry and a kiwi. The skin is a bit tougher than a grape's but not by much. In order to eat the berry, you'll need to twist off the stems at both ends - easy to do, no knife necessary. This is called "topping and tailing" them.


The flesh inside is juicy and soft. In looks a bit like the inside of a passionfruit, but it tastes totally different. The seeds are easily eaten because they are surrounded by sweet, slippery fruit.


These would make a tasty dessert! After some internet research, it appears that the most common gooseberry dessert is gooseberry fool, a recipe for which you can find here. They would also make a great jelly. My recommendation is that you make strained jelly - not jam - since these berries have thick skins. In order to strain, a cheesecloth or a mesh sieve should work well. 

Thursday, July 2, 2009

Summer Corn, a few recipes


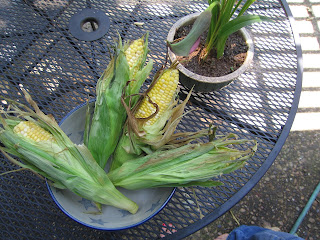
I mentioned in a previous post that I love sweet summer corn. I can't wait until it's finally in season, and I buy it 10 ears at a time to toss over salads, into eggs in the morning, and to spruce up salsas. I love it raw, when it's crunchy and cold, and when I'm ready for a hot meal, I enjoy finally throwing out old bags of chewy frozen corn from the winter. 

I've been reading The Whole Foods Encyclopedia by Rebecca Woods recently, and she has a whole entry dedicated - not to corn - but to corn silk! Unless you have livestock, you're not likely to use any of the leftovers after you shuck an ear of corn. Into the garbage goes over half the actual weight of the original vegetable! According to Woods, corn silk has a variety of medicinal qualities. It is a diuretic, which can help reduce blood pressure and edema and dissolve kidney or gall stones. 

So in light of Woods's book, I've been experimenting with corn silk. Here are a couple of ideas you can try too, plus one recipe for grilled corn ears!

In order to remove the silk, pull the corn husks all the way back away from the kernels. Gather the silk around the edges, and pull it away at the base of the ear. If you're planning to use it immediately, the silk can be enjoyed fresh. You can also spread the silk out on a cookie sheet and allow it to dry in the sun, which takes about three days. (I covered the cookie sheet with a dishtowel in order to prevent bugs from getting in it). The dried corn silk will keep for approximately two weeks stored in an airtight container.

Corn Silk Tea

Boil a pot of water in a kettle. Pour the water into a mug, and then add a small bundle of silk. Stir in a spoonful of honey, and allow the tea to brew for five minutes before removing the silk. This makes a thick, sweet, and healthy tea to enjoy in the morning and also after a big dinner in the evening.


Corn Silk Vegetable Stock
recipe from my mother

Ingredients

6 cups water
1 large bunch corn silk
1 small potato, cubed
1 medium carrot, sliced
1 bunch celery leaves (keep these frozen after you eat celery stalks, use the next time you make a stock)
1/2 of a medium onion, sliced
2 garlic cloves
handful of spinach leaves
any other leftover vegetables you have in your fridge!
1/2 tsp. salt or to taste
3-4 twists of freshly ground pepper

Method

Add all ingredients to a medium saucepan, and bring the water to a boil on the stove. Allow to boil for 5 minutes, and then reduce to a low simmer. Simmer for 20 minutes. Remove the pot from the burner. Taste the stock, and adjust the salt and pepper. Then cover the pot, and let the stock cool for about 20 minutes. After it cools, strain the stock into a bowl, and store in the refrigerator until you are ready to use it. Corn silk stock is sweet and deeply flavorful. 


Grilled Corn with Albuquerque Butter

Ingredients

1-2 ears of corn per person

For the Albuquerque Butter
makes 1/2 cup

8 tbsp. (1 stick) butter
2 tbsp. minced scallions
1 tsp. salt
1/2 tsp. ground cumin
1/2 tsp. dried oregano leaves, crumbled
freshly ground black pepper to taste

Method

Mix all the ingredients for the butter in a small bowl until the butter is soft and all ingredients are combined. Before you are ready to use the butter, store it in a covered bowl in the refrigerator.

In order to prepare the corn, soak all the ears in ice water for 15 minutes. After that, drain them, and pull the husks all the way back to the base of the cob. Remove the silk (and save it for tea and stock!) Then brush a medium coating of butter all over the kernels, and recover the ear with the husks. If you have soaked the ears, you can place the corn directly on the grill on medium heat. If you did not soak the ears, wrap them in foil before you place them on the grill. Grill for approximately 20 minutes. This will result in corn that is lightly grilled, retaining the crunchy texture of the summer corn.