Sunday, September 20, 2009

NEW SITE + A GAME

Hello Readers!

Let me direct you to my new and improved site! From now on you can view new posts there.

You can click on the link above or else use the following URL:


Hurry over because we are playing a game!

Next up: Roasted Peppers . . .

Sunday, September 13, 2009

Sardine Dip


I'm a terrible food blog addict, and I realized earlier today that I have yet to offer you a list of my favorite food blogs in order to lure you into complete addiction with me! And really, I'd love a little company so expect a blog-errific round-up soon.

I'll give you a preview today, though, because recently I tested out a David Lebovitz recipe. David Lebovitz is one of my favorite bloggers out there. He takes beautiful photos, and he's truly a professional baker and cook. He also doesn't skimp on the writing side, as sometimes happens in blogs. He's funny and entertaining and talented at blending information with anecdote. Check him out.

I've had my eye on this particular recipe for awhile now. You'll notice - ! - it's the first less than 100% vegetarian recipe on this site, which means that I'm letting you all in on a teensy secret: after giving it up for four years, I now occasionally eat fish. Basically, I was eating dinner with some friends a few months back, and when all of a sudden and for no particular reason, I really wanted one of the shrimp tacos. It was eaten, and my taste buds felt happy. (This is also, incidentally, the same way I originally became a vegetarian - suddenly and for no particular reason). However, don't expect me to be eating anything but fish anytime in the foreseeable future. Who knows, though? Maybe I'll start to post fish dishes more frequently on TMTP.


The second thing you'll notice is that I changed the name of this recipe from the name that David Lebovitz uses. Some people just seem to get the jitters when they hear the word paté. Think about it like this. You've all had crab dip, right? You'd still eat it even if it were called crab paté, wouldn't you? Well, this works the same way. Here paté is just a fancy word for dip. Some of you are also probably running the other way because the idea of eating a sardine makes your stomach turn, and to you all, let me just say that even my none-fishing-eating aunt and grandfather liked this stuff. It's a salty snack food that goes perfectly spread on top of a cracker, alongside a tray of munchies like fresh cheese, sliced peppers, olives, and grapes. Don't knock it 'til you've tried it.


Sardine Dip
adapted from David Lebovitz
makes 8 servings

Ingredients

-2 cans of sardines, drained (approx. 300g, preferably packaged in water)
-2 green onions (Lebovitz uses shallots)
-1/2 bunch parsley (Lebovitz uses chives)
-big pinch of chile powder
-1 tbsp. butter, room temperature
-2 tbsp. olive oil
-salt and pepper to taste
-freshly squeezed lemon juice (approx. 1/2 - 1 lemon)

Method

in the food processor
Coarsely chop the onions and parsley, and then dump them, along with the drained sardines, chile powder, butter, and olive oil in the processor bowl. If your sardines still have bones, you can leave them in the dip. They are soft and will be easily pulverized. Pulse the ingredients until combined but still chunky. Add salt, pepper, and lemon juice to taste, and then pulse a few more times until the seasonings are mixed in and the dip is a little smoother. Then continue to prepare the recipe according to the instructions that follow the "by hand" paragraph.

by hand
Open the sardine cans, drain the fish, and, if the fish are not yet deboned, remove the larger bones (such as the vertebrae) with a fork and paring knife. You probably won't be able to take out all the bones, and that's ok because they are still easy to mash using a fork. Dump the fish into a medium bowl. Finely sliver the green onions, and mince the parsely. Add them to the sardines, along with the chile powder, butter, and olive oil. Mash the mixture with a fork until you achieve your desired texture. Mix in salt, pepper, and lemon juice to taste.

Chill the dip for at least 1 hour before eating, but allow it to return to room temperature to serve. The dip keeps - and even improves - for 3 to 4 days when refrigerated in an airtight container.

Monday, September 7, 2009

German Pastry Series: Almond Crescents


I'm a careful eater. I conscientiously eat yoghurt, sunflower seeds, and chopped fruit every morning for breakfast. When I cook for myself, I always steam my vegetables instead of cooking them with oil. I buy whole grain everything. I monitor my protein intake, and I eat things like raisins and prunes for snacks. Basically, I have a lot of annoying food habits, and it takes something really stressful to break my willpower.

When my willpower goes down, though, it usually follows three general paths:

1. Peanut butter
2. Chocolate
3. Any and all baking ingredients

(The only good thing about the above list is that no one ever steals from my peanut butter jar because - since my willpower does not break down along a "sliced bread" path - I eat PB directly off the spoon which I double, triple, quad..*ahem*..dip).

Why am I telling you this? Because these cookies totally stressed me out, and since, as I already mentioned, my broken willpower almost always manifests itself through intense sugar binges, the combination of stress and cookie really does not make for a pretty result. I mean, I ATE. As many chocolate chips as I could stuff in my mouth at once. Chunks of marzipan. Toasted almonds, yes, want! Where's the spatula so I can scrape the bowl? Why not also scrape the melted chocolate? Lick the spatula!

I made a million critical errors during the production of these cookies. For example, when I'm altering a recipe that I plan to blog, measure the flour! Also I ruined the chocolate chips that I melted in the microwave - how is that even possible? I decided, even though I knew that the cookies had a high sugar content and no butter, that I wouldn't grease the baking sheet. Fail! Stick! Spilled almonds, yes; almonds that fell off the cookies, of course, and no, fake Ziploc really doesn't work well for piping melted chocolate. Instead, it leads to chocolate blobs all over your face, table, and chair.

I should have taken a picture for you, but unfortunately that was impossible because my fingers were covered in my melted chocolate failure, and my palms were full of dough that I was stuffing in my face.

(Hang on - peanut butter run - just writing this is stressing me out! Let me just stick that spoon into the dishwasher. . .)

But wait, don't go run for you peanut butter jars just yet! (What's that? You don't binge on PB? Because you really should). I have conveniently fixed up this recipe so that you avoid all of my silly mistakes! More importantly, these cookies were heavenly. I just ate the last one. Mmm, mmm, mmm.


Almond Crescents
recipe adapted from here
makes about 4 dozen

Ingredients

-500 grams marzipan (check the package for the weight)
-1 1/3 cups sugar
-1 pinch salt
-3 egg whites
-1 cup flour
-1 cup sliced almonds, coarsely chopped
-butter or shortening for greasing your baking sheet
-3/4 cup semisweet chocolate chips

Method

Preheat your oven to 350 degrees. Thoroughly butter a cookie sheet.

In a medium bowl or in the bowl of your standing mixer, mix together the marzipan, sugar, salt, and egg whites until the ingredients are thoroughly combined and the dough is soft. Then slowly add the flour a tablespoon at a time. The dough will still be sticky, just less so, at the end.

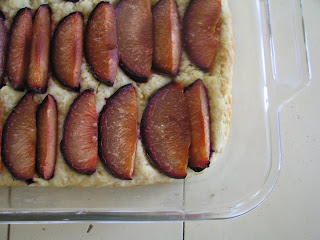
Then you'll need to shape the cookies. To do this use either piping tools - a heavy pastry bag and a 1/2-in-wide piping tube - or else a heavy duty Ziploc bag with a 1/2-in-wide whole cut in one corner. Fold over the top of the bag, and put a large scoop of dough inside. You don't want to overload the bag because it could burst or squirt out the top, but you also need enough dough to create enough tension to be able to pipe at all. Unfold the bag, and twist the top tightly. Pipe crescent-shaped snakes of dough that are about 2 1/2 inches long, spacing them 1 inch apart on a cookie sheet. Check the above picture to see what the unbaked dough snakes should look like.

Now pour your coarsely chopped almonds into a bowl, and, using your fingers, press almond chunks into the tops of the cookies. Make sure they are firmly embedded into the dough or else they may fall off. Bake the cookies for 12 to 17 minutes until they are lightly browned. After I severely underbaked the first dozen, my cookies took about 16 minutes to finish.

Once the cookies have baked, remove them from the oven, and let them cool about 75%. Then transfer them to a wire wrack or another surface to cool completely. You'll be adding chocolate to the tops next so it may be helpful to put your cookies in the fridge until just before you add chocolate.

In order to decorate the tops with chocolate, melt the chocolate chips in the microwave, and give them a stir. You can then either dips the ends of the cookies into the chocolate or you can use the tines of a fork or the end of a spoon to drizzle threads of chocolate over the tops of the crescents. I opted for method two, and, post-chocolate explosion, my cookies turned out beautifully. Return your cookies to the fridge to cool for at least 1/2 hour before serving.

Excellent with tea, coffee, or ice cream.

Friday, September 4, 2009

German Pastry Series: Plum Cake


I'm back with round number two of the German pastries! Want to see the wreckage from the baking? Not a great picture, but it gives you an idea.


If you're an avid food blog reader like me, you might have read Smitten Kitchen's post on plum kuchen a few weeks back. Problem is, though her kuchen looks fab it is also totally unlike I anything I ever saw in Berlin. I'm not sure if her recipe is really that different, but I'm certain I never saw plums arranged that way on any Berlin cake slice - and let me tell you, boy did I ever see a lot of plum cake. Journalistic integrity, however, does make me pause to confess: I think Smitten Kitchen's plum kuchen is brighter and prettier than most of the German versions I saw. As for the taste, I really can't say because I'm going for authenticity here, and as such, I shopped around for a plum cake recipe that seemed a bit closer to what I saw.

Now I said I would be honest about my reviews of the recipes I chose for this series. The plum cake was indeed tasty. I also had really ripe and sweet plums working for me. (At $4 a pound they better have been good)! Actually, I think I could just make and eat a whole pan of baked plums alone. In the cake itself the contrast of the tangy lemon in the bread combined with the sweet fruity top worked well. This cake isn't too heavy either. It's light enough even to eat for a breakfast if you want a little splurge.


However. The cake could have been a bit thicker and a bit more moist. To correct that I have two suggestions. 1) Stir in 1/2 cup buttermilk to the recipe and 2) serve this cake with vanilla yoghurt or vanilla ice cream. If you're really going for fluffy, you can also stir in a beaten egg white instead of or along with the buttermilk.

Also make sure you eat this cake the day you make it because, as with all cakes with fruity tops, it's likely to get soggy by the second day.

With those updates, I think you'll love this cake.


Plum Cake
recipe adapted from here

Ingredients

-1/2 cup lukewarm milk
-1/2 tsp. sugar
-2 tbsp. yeast
-2 cups flour
-1/4 lb. (1 stick) unsalted butter
-2 tbsp. sugar
-1/4 tsp. salt
-3 egg yolks, slightly beaten
-zest of one lemon
-plums, de-stoned, enough to cover a 9x13-in. glass pan when sliced
-a couple of tablespoons of extra butter

plus, if desired
-1/2 cup buttermilk
-1 egg white, beaten until stiff peaks form
-vanilla yoghurt or ice cream for serving

Method

Pour milk into a small bowl, and stir in 1/2 tsp. sugar. Add the yeast, and stir. Let the mixture foam for about five minutes. (If the yeast doesn't foam, start over). In another bowl, medium-sized, measure out your flour, and then crumble the butter into it with your fingers. Using a pastry blender or your fingers, work the mixture into crumbs. You can also use a food processor; mine was full of streusel at the time. Then add the 2 tbsp. sugar, the salt, egg yolks, lemon, and combine either with a fork, a mixer/beater, or a food processor. Now you can add the buttermilk if desired, and if you want to add the beaten egg white as well, fold this in as the last step. The dough will be slightly stiff.

Pull out a 9x13-in glass pan, and spread the dough into it, leaving a 1/2-in space between the dough and the edge of the pan. Since the dough is quite buttery, you probably won't need to grease and flour your pan. Cover the pan with a dish towel, and allow it to rise for 1/2 hour.

Just before the dough has finished rising, preheat your oven to 350 degrees. Then wash, de-stone, and slice the plums into wedges. After the dough has risen, arrange the plum slice on top of the cake. If you want it to look authentic, follow the pattern I used in this picture. Using the extra tablespoons of butter, place some small pats of butter on top of the plums.


Then bake the cake for approximately 25 minutes, until the plums have become soft, and the dough is lightly browned. If the plums look dry, that's ok. They'll taste great. After you remove the cake from the oven, chill it until it is at room temperature. If you want to be really German, serve the cake by cutting it into squares and arranging them on a large plate. Make sure to put a bowl of yoghurt beside the sliced cake for those who want a little creamy taste to complement the fruit.

Tuesday, September 1, 2009

German Pastry Series: Mohnkuchen


I've told you about German pastries before. I've even been a terrible friend by showing you photos but leaving you no recipe. All of your poor folks left to live vicariously through pictures. I know, I know. Life just isn't fair.

But today I'm here to bring a little bit of equality to the world, provided you've got on your baker's hat!

As a mentioned before, I returned to the US just in time to celebrate my grandmother's birthday, and we kicked off the event this past Friday with some early morning baking. I chose three German pastry recipes to test, all chosen for different reasons. The recipes were obtained from the internet - not without some searching - because none of my cookbooks had recipes for the pastries I selected. I'll tell you how our baking went and how the recipes turned out, but don't worry, I'll let you know when I have suggestions to improve the recipe.

We started this week with Mohnkuchen, my absolute favorite German pastry ever. Mohn, for the non-German speakers like me, is poppy seed. Kuchen is cake. So do the math: Mohn + Kuchen = Poppy Seed Cake. Forget the typical American poppy seed recipe, the lemon poppy seed cake (not that I'm bashing it because it's certainly tasty), but this poppy seed mixture combines a sweet shortbread with a thick layer of the seeds, which have been swirled in all sorts of goodies. Topped with streusel, mohnkuchen is fabulous, a total show-stealer. You'll eat the whole thing in minutes, your guests will love you, please - make - this - immediately.

Mohnkuchen is a good tea pastry, and it makes a nice party cake too. If you're looking for an enormous sheet cake to serve 35 people, you might want to look elsewhere, but this is perfect for about 8 to 10. Umm, if you don't eat it all first.


Mohnkuchen
recipe from here
serves 8 to 10

Ingredients

for the dough
-1 cup sugar
-1 cup margarine (note: I used butter-flavored Crisco)
-1 egg
-4 cups flour
-1/2 cup evaporated milk
-2 1/2 tsp. baking powder

for the filling
-1/3 cup. cream of wheat
-2 1/2 cups water
-1 cup sugar
-1 tsp. vanilla
-1 tbsp. butter
-1 cup poppy seeds
-1 egg

for the streusel
-1 cup butter
-1 1/2 cup sugar
-2 cups flour
-2 tbsp. evaporated milk

Method

Making the dough is easy. Combine all ingredients in a food processor, and pulse until lumps form. I have a small food processor so I had to do this in batches. Then press into a 10-in. springform pan. I didn't use all of the dough here because I didn't want a super thick crust. My dough was about 1-in. thick. Feel free to make yours thicker. [If you have leftover dough, make it into shortbread by pressing it into a springform pan, and baking it on 350 degrees for 25-30 minutes or until lightly browned and quite firm]. Set the pan aside while you start the mohn filling.

For the filling, pour the water into a saucepan, and prepare the cream of wheat, using that water, according to the directions on the box. Once the cream of wheat is soft and has thickened, remove from the heat. Stir in the sugar, vanilla, butter, and poppy seeds. The sugar should dissolve since the cream of wheat is warm. Stick the bowl in the fridge - without adding the egg. You'll want to chill the mixture before adding the egg so that you don't end up with mohn filling + scrambled eggs.

Preheat your oven to 350 degrees.

While you're waiting for the filling to cool down, make the streusel. It's also as easy as the crust! Wash your food processor, and then put all the streusel ingredients into it. Pulse until lumpy (but not doughy).


By now the filling should have cooled off. It doesn't need to be cold, but make sure the heat has reduced enough that the egg won't cook. Add the egg, and mix well.

Now pour all of the filling over the crust. Then sprinkle the streusel over the filling, covering the entire filling, creating about a 3/4 to 1-in. thick streusel topping. I also had leftover streusel.


Bake it! The mohnkuchen will take about 1 hour to bake. The streusel should be lightly browned, and the pastry will be quite firm. After the baking, chill the pastry until cool. During this time, it will firm up even more. After it has chilled, remove the springform ring, and set the pastry on a cake plate. The pastry will now be completely delicious and beautiful!

Sunday, August 30, 2009

Guest Post - Pasta Raphael


Remember my sister's Guest Blog Number One? Well today I'm introducing you to another guest blogger. This time, though, you've met this woman before. Her recipes have been featured numerous times, and I know you've all been waiting for another. I asked both of the guest bloggers to prepare their posts awhile back so this entry has been on deck for a couple of weeks now. Now as you're rushing to make the best of all the last of the summer produce, today's recipe is perfectly timed. So before you begin pulling out your shopping bags, let me introduce you to my mother, who will having you reaching for those ripe tomatoes and the fresh basil here in the last days of the season. From here on out it's in her words.


The title banner of this blog states that it is written by ex college students. Let's just get this out in the open right away. As Lindsay's mom, I must confess that I am more an ex, ex...maybe even another ex...college student. So how great is it that my daughter invtes me to guest blog? I will also confess, that I think (hope?) it is from me that Lindsay gets her foodie tendencies, and her healthy eating habits. (All that hand-ground organic baby food paid off!) I have often shared with Lindsay that for me, food is about much more than just satisfying our physical needs; it is about relationship. In our family, life in all of its glorious ordinariness has often taken place around the kitchen island. My own mother taught me to cook early in life by assigning me the task of planning and preparing a couple of meals a month for our family. For those of you out there who are flaming feminists as is my daughter...never fear! In my egalitarian family, this task fell to both boys and girls. As a result, my brother is a good cook as well, although his repertoire is somewhat different from mine. So Lindsay and her siblings may not have been born with a silver spoon in their mouths, but they were definitely born with a wooden spoon in one hand and a wire whisk in the other. Lindsay has mixed, stirred, and experimented in the kitchen with me ever since.

For those of us in the three-digit temperatures of Texas, this pasta
is de rigueur for those long, lazy days of summer! Paired with a crisp, tender mesclun salad and some rosemary onion focaccia bread, it is the perfect al fresco dining after the sun has set, the stars have come out, and the temperature has dropped into double digits. It is also an impressive picnic option. Just pack away in a beautiful jar, throw it in a cooler along with a fruit salad of those lucious summer fruits--think strawberries, bluberries, blackberries, watermelon, and peaches--and head for the nearest source of water. Makes me long for the beach!


Pasta Raphael

Ingredients

-4 lbs. ripe meaty tomatoes
-2 jars (6 oz.) marinated artichokes
-1/2 cup best olive oil
-2 cups coarsely chipped yellow onions
-4 garlic cloves, peeled and finely chopped
-1 chopped chopped fresh basil
-1/2 tbsp. chopped fresh oregano (can use dried)
-1/2 cup finely chopped Italian parsley
-1 small dried red pepper, finely crushed
-1 tsp. salt
-freshly ground pepper to taste
-1/2 cup shredded imported Romano cheese

-your favorite pasta noodles*

Method

Bring a large pot of salted water to a boil. Drop tomatoes into the water a few at a time. Scald for 10 seconds, then remove from the water with a slotted spoon.Transfer the tomatoes to a bowl of ice water. Drain toatoes and slip off the skins. Cut crosswise into halves, squeeze out seeds and juice, and chop coarsely. Reserve.

Drain artichokes, and reserve marinade.

Heat olive oil in a large saucepan, and saute onions, garlic, basil, oregano, parsley and red peper over medium heat for 5 minutes. Add fresh cracked pepper. Add tomatoes to the sauce. Season with about 1 teaspoon salt, and simmer uncovered over medium heat for 1 hour.

After the sauce has simmered, add reserved artichoke marinade, and simmer, stirring often for another 30 minutes.

Stir in artichoke meat, and continue to simmer until sauce is rich and thick--another 20 minutes or so. Stir in Romano cheese, taste, and correct seasonings. Serve over your favorite pasta
, garnished with extra shredded Romano cheese.

*If you can get it, fresh pasta
is worth the expense and trouble, but frozen is an acceptable substitute--much better than dried!

Thursday, August 27, 2009

Napa Cabbage Sesame Salad


We're back!

And it's been too long! Have I lost all of my devoted readership? Let me tell you what's up been keeping me from you.

1. A research project for my summer university
2. 2 goodbye parties for said university
3. Pizza consumed during the goodbyes
4. 1 week of cleaning out the fridge
and
5. 12 hours of tasteless, sandy airplane food + 14 hours of overpriced airport food

However, ladies and gents, now that I'm back to on dry ground, I've got no more reasons not to blog and my "to bake" list has increased by a few too many recipes. I'm visiting family in Texas, which means that I'll also have plenty of ingredients to work with. We've got some birthdays (i.e. cakes!) coming up around here, plus isn't Labor Day the best day to make really make good use of all that summer produce?

Over the next week I have another special guest joining us for a blog (did you see TMTP's first guest blog?) and I also have a short mini-series coming up. On top of that I'm planning to review a few foods and restaurants that I've tried recently.

Let me first share one of the recipes with which I was welcomed back to the Lonestar State.* We had this recipe just last night when my aunt came over for dinner. We wanted something light and fresh, and considering that it's August here in the Lonestar State,* it's really too much to ask that we heat up the house with the oven or the stove. My mom originally got this recipe from a restaurant in the Texas Hill Country, and she's since adapted it to make it even better. Napa Cabbage Sesame Salad can really be played with, and I'll offer some tips here. You can make a budget variety, a protein-boosted variety, a carnivorous variety, etc.

Napa Cabbage Sesame Salad

Ingredients
I'm giving the basic ingredients here. See below the recipe method for variations.

for the salad
1 head shredded Napa cabbage
2 oz. toasted nuts
2 oz. toasted sesame seeds
2 packages Ramen noodles

for the vinaigrette dressing
6 oz. peanut oil (that's about 3/4 cup)
6 oz. rice wine vinegar
1 oz. honey
2 oz. sesame oil
salt and pepper to taste

Method

Prepare the salad and nuts. Shred/slice the cabbage, and put it into a large bowl. Toast the nuts and sesame seeds. [Don't know how? Check out this handy chart! Sesame seeds should be toasted at 275 degrees for about 5 minutes. Make sure to give both the seeds and the nuts a few stirs during the toasting process]. Allow them to cool afterward, and put them in a medium bowl. Open the Ramen noodles. Toss the seasoning packages - you won't need them. Crumble the dry noodles into the nuts, and combine.

Make the vinaigrette. Find a jar with a tight-fitting lid. Pour all of the ingredients into it, and shake vigorously to combine. Open the jar, and season with salt and pepper.

Put together the salad. Pour the vinaigrette over the cabbage, and then add the nuts and noodles as well. Toss the salad very well, and then taste and adjust salt and pepper if necessary. This salad is good right away because the ramen will still be crunchy, but it's also good a day later because the cabbage will have become tangy and sweet after absorbing all of the vinaigrette. The cabbage will become a bit droopy though so if you're planning to serve to a group, make the salad the same day you'll be eating it.

Variations:

-Try different types of nuts: I've used cashews, pine nuts, pepitas/pumpkin seeds, and sunflower seeds. Go with sunflower seeds if you're on a budget, pine nuts if you want a classier salad, cashews if you want the nut to really absorb the dressing.

-Vary the vinegar and oil. Wok oil is a spicier sub for sesame oil, and it's a good combination with pepitas. Red wine vinegar and sherry vinegar make tarter replacements for rice wine vinegar.

-Want to make this into a meal? The original recipe called for adding strips of baked or pan-fried chicken. I add spicy soy strips to my salad. You can also add stir-fried tofu chunks. Serve with rice.

-Add a few more veggies. Water chestnuts, bamboo shoots, or slightly sauteed oyster or enoki mushrooms would be great additions.

*I don't really call it that.